

In this guide, I'll guide you through my sketching process that I use to generate original and inspired logo concepts.
I'll cover everything from the differences between sketching and digitising, to how to prepare for sketching, how to use your inspiration to come up with ideas, and how to pick the right ideas to develop.
My hope is that by the end of this guide, you’ll have a better understanding of how sketching can help you produce better logo designs, and you’ll be clearer on the process – all ready to incorporate it into your own workflow.
🧭 This article provides a more in-depth explanation of my sketching process (in 'Stage 2') as detailed in my free Logo Design Process PDF Checklist.
Why is Sketching Essential for Logo Designers?
When I first began designing logos over 20 years ago, I didn't have a lot of confidence in my sketching abilities. In fact, I thought I could skip sketching altogether, assuming it would be more efficient to create my logo concepts directly on the computer.
But through trial and error, I eventually realised that skipping sketching wasn't doing me any favours. I found I was restricting myself to familiar ideas as well as my technical abilities in Illustrator – just like my experience playing with Lego as a kid; without instructions and a plan, I struggled to build anything interesting using the lego pieces in front of me, and repeatedly built similar structures.
Similarly, designing logos without a plan can lead to repetitive, uninspired designs. Taking the time to sketch out a few ideas will help you to visualise possible layouts and structures, and provides a roadmap to follow when creating your digital concepts on the computer.
Once you have an idea, it's much quicker to digitise a logo concept – even if you need to read a how-to article on how to create a specific effect – than it is to play around aimlessly without any particular direction or goal in mind.
This is why sketching is so important. So don't skip this step! Your sketches will help you stay focused, and prevent you from getting lost in the process.
Sketching vs Digitising
Before outlining my approach to sketching, it's important to understand the stages of sketching and digitising. Although these stages are interconnected, they serve different purposes and require different skills. By understanding the differences between these two stages, you'll have a much clearer understanding of what you should be doing, and when – clarifying your overall process as a result.
Think of sketching as the process of exploration and digitising as the assembly of these explorations into a concrete concept.
Sketching:
- Brainstorming: Sketching is your playground where you're free to let your imagination run wild. Here, there's no right or wrong. It's all about exploring ideas and generating them quickly and messily.
- Problem-solving: Here's where you visually think through your ideas. You're problem-solving and figuring out what element goes where.
Digitising:
- Polishing: Once you have your sketches, digitising is the stage where you refine them on the computer using a vector program to create clean and precise designs, turning your rough ideas into concrete concepts.
- Finalising: This is also the stage where you finalise your design elements, including colour, typography, and layout. It's about precision and detail here.
Can't draw?
It seems like a valid reason to skip sketching, right? Sketching isn't about creating a masterpiece. It's about capturing the essence of your ideas in the simplest and most straightforward way possible. You don't need high-level drawing skills. All you need to be able to scribble down shapes, symbols, and quick lines that represent your thoughts. The quicker and rougher your sketches are, the better. If you can understand the idea you're trying to communicate to yourself, that's all you need.

Get Prepared for Sketching
Before diving headfirst into sketching, I lay the groundwork with three crucial steps. These steps ensure I'm prepared with all the information I need to use as my compass throughout the process.
These steps are:
- Step 1: Detail. I ask my client all the necessary questions to gain a good understanding of their goals, preferences, and needs.
- Step 2: Define. I clarify and confirm the brief, and identify any keywords or themes that have emerged.
- Step 3: Dig. I spend at least an hour researching other brands and finding inspiration from various sources such as Pinterest, Google, and printed publications.
Once these three steps have been done, the groundwork is in place and it's time to start sketching.
My Sketching Process
This is a repeatable 3-step process, and I've recorded myself doing this for one of my logo design projects in the video below:
1. Get setup
First, I gather all of my research and inspiration and have it together in one place. Most of my research and inspiration is digital, so I'll sit at my desk with my computer in front of me.
- I'll have my Notion dashboard open in one browser tab, showing my research and inspiration
- My project-specific Pinterest board open in another tab
- My sketch book and a pencil and eraser

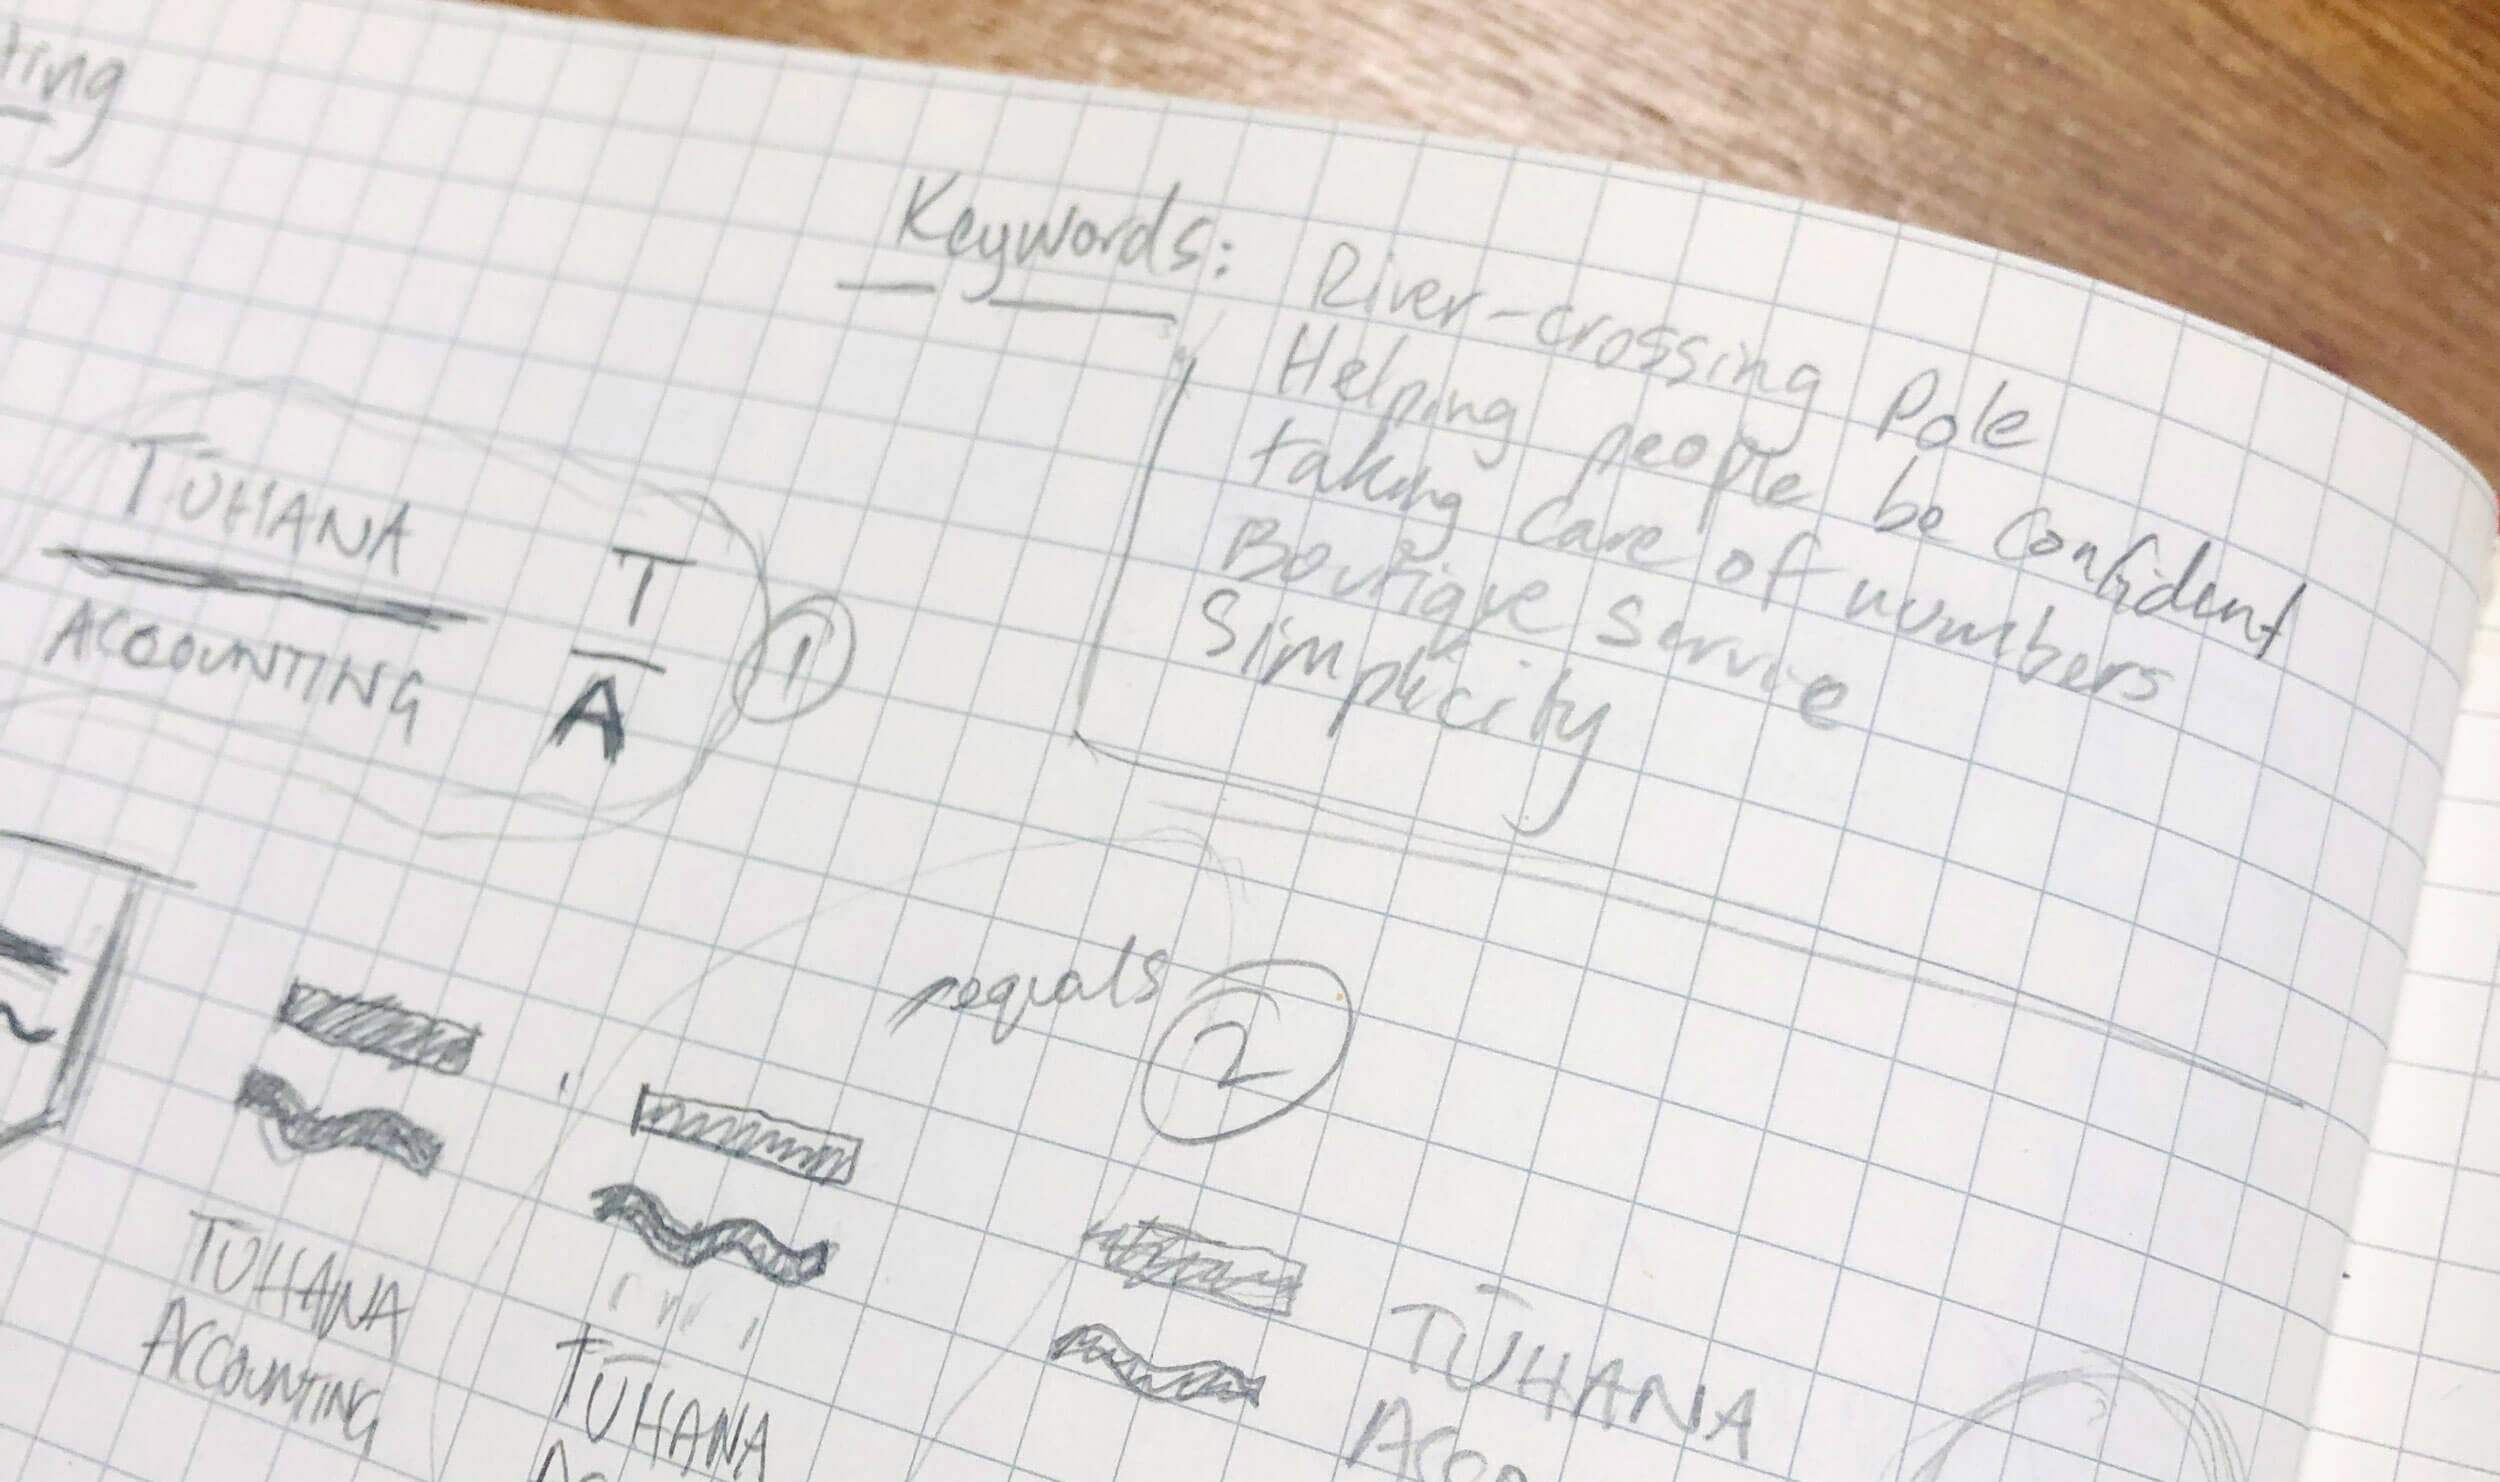
2. Jot down keywords
First, I jot down all the important keywords I've collected from earlier on a corner of my sketchpad. This helps to spark ideas and keep me focused on the brief.
3. Reference, then sketch
Next, I'll look at my inspiration. I'll determine what I liked about it, and then see how I can incorporate that idea or feeling into a concept.
My sketches are raw, unpolished, and lack detail. I focus primarily on the overall layout, occasionally including a few rough design elements. It's like a strategic game of Tetris, figuring out where each design element will fit best. By the time I start sketching, I've already identified the elements that need to be on the page, so I experiment with their arrangement, but I don't obsess over details. These sketches are just the beginning of an idea and will develop as it moves toward a finished design.
I'll keep exploring arrangements until I feel like I've explored all possible variations.
👉 How quickly should you sketch each concept? As a guideline, if you're spending more than a minute or two on a concept, that's too long. Remember during this stage, it's all about volume. The more you sketch, the better. Explore ideas, shapes, and symbols that relate to the brand. Don't worry about the neatness of your sketches. Be messy, scribble. Get the idea down and don't spend too much time on it. As long as the sketches serve their purpose - to channel ideas from your mind onto paper – they're doing their job. It's about progress, not perfection, a visual brainstorming session where the only rule is to keep your pencil moving.
I know I'm done exploring an idea when:
- I have a gut feeling that there's a good idea behind it, or
- I don't feel like it's going to work and it's time to let the idea go.
Imagine these gut feelings as a radio frequency; at first, it might be a bit fuzzy. It's a skill that grows stronger with time. With consistent practice, you'll soon find yourself perfectly tuned in to this creative intuition.
Great, so we have explored one idea. Now, I will go back, find more inspiration, sketch ideas based on this, and repeat this process until I have spent around 40-80 minutes sketching and have at least three good idea concepts on the page.
👉 20-in-20 Exercise: If you have trouble with perfectionism and find it hard to be messy, you're going to need to train yourself to let go. A good way to do this is to train your brain with some 20-in-20 exercises; sketch 20 unique hand-drawn concepts in 20 minutes. For one minute, sketch your concept. At the end of that minute, stop. Start a new concept. Repeat this 20 times.
Choosing Potential Logo Concepts
At this stage, I take a break, which could be just going for a walk or leaving it overnight. Fresh eyes can often spot potential that tired eyes miss. Plus, stepping away can provide a fresh perspective.
Once I am refreshed, I search for standout ideas based on originality, relevance to the brief, and promising concepts that I can refine further. From there, I choose three of the best ones, circle them, and put a number next to them to indicate they are my chosen concepts.
I generally use the following three guidelines for selecting concepts:
- Safe: A design based on the client's request or the most safe idea.
- Clever & safe: What the client has asked for with a unique twist or a clever and safe idea.
- Clever & left-field: Completely out-of-the-box and innovative, perhaps unusual for the brand's industry.
And just like that, we've reached the end of our sketching process. With our top three concepts selected, it's time to breathe life into them using Illustrator (digitise).
Concluding Thoughts
And there you have it! After reading this article, you should now understand:
- Why sketching is an essential part of the design process
- The difference between sketching and digitising, and when to do them
- The necessary preparation steps before starting the sketching process
- The reference-then-sketch repeatable method, using inspiration to spark ideas
- The criteria for selecting concepts to digitise
I hope you've gained some insights that you can incorporate into your own logo design process.
If you have any questions or feedback, feel free to email me here. I would love to hear from you.
Happy sketching!